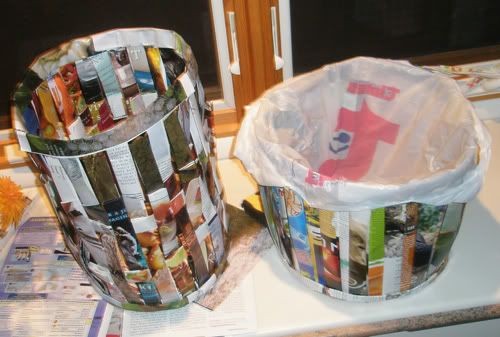
Pro's and Con's to Version 1 vs. Version 2:
-v.2 uses more magazine pages
-v.2 does not have holes on the sides
-v.2 may not have the structural capabilities to be very tall
-both versions should not hold wet trash without a plastic bag (see finished product at the end of this post)
Materials:
-A lot of magazines (I used about three magazines that were a little less than 1/4 of an inch thick)
-Hot glue + hot glue gun (make sure you don't burn yourself or others)
Process:
 First of all, I must warn you: This project took me about three hours to make, so make sure you are willing to devout your time. But once you are done with your product, you will be amazed at how much it grew and what it became.
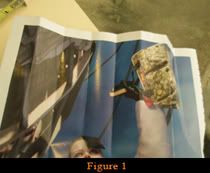
First, tear out a magazine page. Then fold it in half the long way (see figure 1) four times (or until it gets to about 3/4 of an inch in width). It doesn't matter if your tear is crooked or not perfect because when you fold it, the tear-line isn't shown. You will need a lot of these sheets because they make the base of your trashcan.

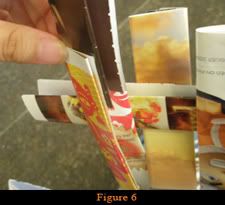
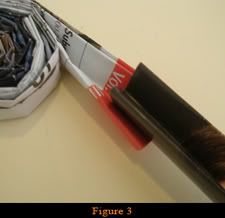 In order to assemble these sheets together, you will need to glue them into a giant spiral (see figure 2). I would pre-bend them in the spiral shape, so you do not have to waste extra time while the glue is quickly drying. Then apply hot glue to the magazine in dots spaced about an inch apart or so because if you hot glue a continuous line, you will use a ton of glue. By making dots, you reduce the amount you use by about half or more! In order to add another sheet to the spiral, put it inside the current piece’s end (overlap by about 3/4 of an inch) and attach it with a dot of hot glue (see figure 3). Continue until the spiral is about 9 inches in diameter (from one end of the circle to the opposite end of the circle). But don't glue the last piece all the way down; leave a small tab because you will add to it later.
Now you have to fold more magazine pages, but fold it in half three times instead of four. Try to use the pages with lots of color or cool pictures because these will make up the walls of your trashcan. Some of these sheets will also help stabilize the walls of the piece.
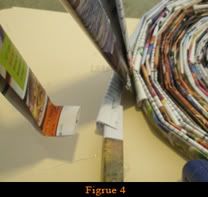
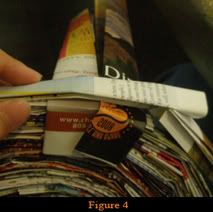
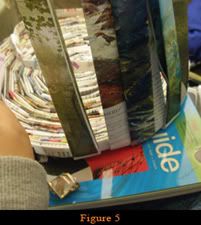 Fold about a 1 inch tab on one end of the newly folded sheets (so the ones folded in half three times) and glue the tabs to the bottom of the base (see figure 4). Glue them about 1/3 of an inch apart from each other until you went all the way around the base. Then get more of the tabbed sheets and glue them on the outside of the current ones to fill up the spaces between them (see figure 5). Also, glue these new strips to the current ones (where they overlap) at the top, so they stay in place. Now in order to fasten them, glue more of the skinnier magazine sheets (the ones folded four times) and continue the spiral of the base, but this time on the outside of the wall (see figure 4). Continue to spiral until you go all the way around the base. Now you can glue the base-strip of magazine down and finalize the base.
If you want to make the wall higher, then you can add another magazine sheet to the vertical ones using the same method you did when you made the base (see figure 3). I didn't make the sides higher, but it's up to you. I would suggest leaving the height where it is because you can use a plastic bag you get from grocery stores as a shield for the trashcan against wet trash items (see finished product pictures at the end of this post).
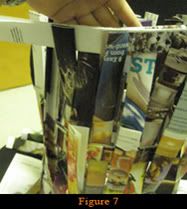
 After you extended (or didn't extend) the walls of the trashcan, it is the time to make the rim of the trashcan. Get more of those sheets folded three times (without the tab) and pre-bend them in a circle since they will be covering the rim of the trashcan (and you don't want to waste time bending them in shape while the glue is drying). Then glue the sheets, so they cover the edge of the trashcan (see figure 6). Make sure you overlap them, so it's more cohesive.
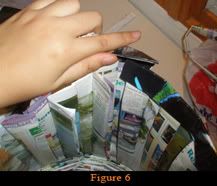
In order to reinforce the bottom, use the bottom of the trashcan to stencil a circle on cardboard. Then cut the cardboard out and hot glue gun it to the bottom of the trashcan.
Here's the finished product! (version 1 is on the left; version 2 is on the right)
No comments:
Post a Comment